Tuesday, January 31, 2012

Some of my favorite Pinterest finds

For those of my friends (I don't think it's too many at this point) who don't have Pinterest, I decided to share some of my favorite Pinterest finds...

This... is made of toliet paper rolls... YEAH.


cards turned into a little album... for those of us who feel badly about throwing away cards...

LOVE... lace and spray paint on a lightbulb! (Not sure what kind of spray paint you would use that won't be a firehazard)

Painted dollar store vases... paint inside to get this awesome look.


Thursday, January 26, 2012

Spinach, Chicken and Goat Cheese Quesadillas

I found this recipe on pinterest and it has become a staple in our house. It is so delicious! In the past, I would have refused to eat goat cheese, simply because of the name. However, I found that it tastes very similar to cream cheese. Now I love trying it in new recipes!


recipe from: sugarcooking.blogspot.com


Chicken, Spinach, Goat Cheese Quesadilla 
Ingredients:


  • Flour Tortillas 
  • Chicken (cooked and sliced)
  • Garlic (1 tsp., minced)
  • Baby Spinach (1 pre packaged bag)
  • Salt, Pepper to taste
  • Goat Cheese (4 oz, crumbled)
  • Reduced Fat Shredded Monterey Jack
  • Non-Stick cooking spray or olive oil
Directions

  1. Heat the spinach with the garlic, salt, pepper, and cayenne pepper over medium-low heat in a pan until just wilted. Remove from heath and set aside.
  2. Heat the grill pan (or regular pan) over medium-high heat. Spray with non-stick cooking spray or drizzle with olive oil. Toast the inside of the tortilla for about 30 seconds.
  3. Take the tortilla off the grill pan and assemble as follows. Over half the quessadilla sprinkle about 2 tablespoons of monterey jack cheese, following by a few slices of chicken, then the spinach, then the crumbled goat cheese.
  4. Add to the grill pan and cook for about 1 - 2 minutes. Carefully use a spatula to flip the empty half of the tortilla onto the loaded half. At this point I like to let the quesadilla cook for about 30 more seconds, then flip it over. Give it another 1 -2 minutes, then remove from the pan and enjoy!


Saturday, January 21, 2012

Big Things

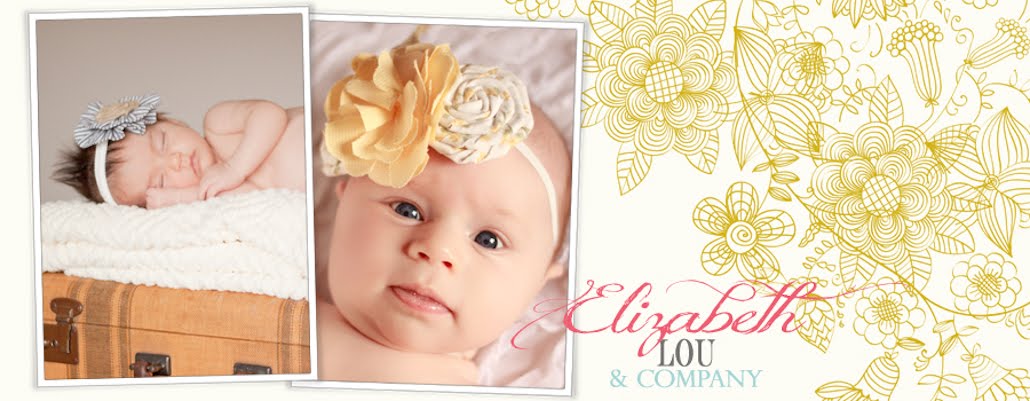
As you may have noticed from my new blog look and header... there are a few changes going on at Elizabeth Lou and Company. Through my quest to capture the perfect images, to showcase my pieces for Elizabeth Lou and Company, I fell in love with photography!

My relationship with photography started in high school when I took a class using a 35mm and a dark room. I loved the whole process and loved taking photos! Now, I have a DSLR and for awhile was one of those people who kept it on "auto" because I was so overwhelmed by it's capabilities. However, I took a photography class this past October with Okello Dunkley. He holds DSLR workshops in major cities, and his classes are really good! My husband coaxed me to go to the class. He knew I wanted to learn how to REALLY use my DSLR, but I was super intimidated. After taking Okello's class and practicing LOTS, my shots started to become what I wanted them to be, which was very exciting! I have also learned... there is always more to learn!

I want to be there to capture moments in time, and to create amazing pictures for people. I have a horrible memory, so pictures for me, are how I remember things. You have to capture the present, to make history. I have a soft spot for newborn shots and I really am a prop junkie! Everywhere I go I see something that I think would make a great prop... my mind thinks in photo props these days! I love all of the creativity that goes along with getting a great shot. It makes my heart happy to see the end result of a beautiful photo that I created and others will enjoy for years to come!

So, friends and family, I would like to introduce you all to Elizabeth Lou Photography & Handmade Delights (I still have my cute little Etsy shop and love creating things!). I hope you all love the photos I share with you and will spread the word about my creations... digital and otherwise! I have found something that truly makes me tick... it's an obsession really...

If you would like to book a session, contact me!


Monday, January 16, 2012

Cinnamon Toast Crunch Cupcakes


Friends... I will not bore you with a long post. I'll keep it short and sweet... TRY THIS RECIPE!!!


Adapted from Your Cup Of Cake

Cake:
3 eggs
1/3 cup oil
¾ cup buttermilk 
1 1/2  teaspoon vanilla extract
¾ cup sour cream
Vanilla Cake Mix (not white cake mix)
1 ½ teaspoon cinnamon

Buttercream:
8 oz cream cheese, softened
½ cup butter, softened
1 teaspoon vanilla
4 cups powdered sugar
1 1/2 cup Cinnamon Toast Crunch powder
1 Tbsp. milk
(Crush the cereal in a bag and then sift out 1 1/1 cup)


Directions:
1.   Preheat oven to 350 degrees and line pans with 18-20 cupcake liners.

2.    In a large bowl, mix eggs, oil, buttermilk and vanilla. 
3.    Add in sour cream.
4.    Add cake mix and cinnamon and mix until smooth.

5.   Fill cupcake liners ¾ full and bake for 15-18 minutes, or until an inserted knife comes out clean.
6.    
      Buttercream: 
      Beat cream cheese and butter until fluffy.  
      Add Cinnamon Toast Crunch powder.  
      Add vanilla and powdered sugar.  
      Adjust the consistency using milk if it is too thick.
7.   Pipe onto cooled cupcakes and top with cinnamon sugar and Cinnamon Toast Crunch squares.


ENJOY!!!

Saturday, January 14, 2012

Fooling around with Fill Light

Well once again... I apologize for the time that has gone by since my last post! We had a busy, stressful week and my mind has been more than preoccupied.

I have also been spending alot of time educating myself about photography- mainly lighting at the moment and have learned some amazing things!

Did you know that a simple, white, poster board can totally change a picture? I learned that the purpose of this is to fill in the shadows in a picture. You simply hold it up to the object or subject (opposite the sunlight). Check out the pictures below to see the difference!

No poster board (light was coming from the right- see the dark shadows on the left of his face). By the way- this is my handsome husband, who was nice enough to be my model :)


Poster Board (I placed it as close as I could to the left side of his face- this bounced the light from the window on the left, on to his face). AMAZING!!


No Poster Board


Poster Board!


photos taken with Canon 50mm f/1.8 lens

Sunday, January 8, 2012

Prophecy Creek Park

I was asked about a month ago to take some family photos for my sister-in-law's, sister's family. I am very new to the photography thing, but I said sure, I could use the practice!

My biggest dilemma was, WHERE am I going to take these photos... I knew the look I wanted. I wanted some interesting architectual backgrounds with nice texture and was stumped by where I would find this. There is Skippack Village, which is a mile from my house... but that has a busy road going through and there was a little one involved. I also thought about downtown Ambler, which is a cute little place, but again, a road going straight through it.

On the way to work one morning, I was keeping my eyes peeled for some interesting places. I saw a sign for "Prophecy Creek Park" in Ambler, as well as a sign for "The Manor House"- wedding, events and catering. I called to enquire about the park and found out that it's free and open to the public! They just ask that you call before using the grounds for photos, in case there is a wedding scheduled.

I was doing some research about the place and came across this whole plan for the park. Apparently it's a preserved land that they plan on adding an amphitheater too and paved walkways, around the multiple acre lands. I found a gem!

If you live in the area and want to read more about it, please check out the link below!
http://www.whitpaintownship.net/pages/rec_openprophecy.php

I loved taking the pictures... little Mia is so entertaining and adorable and Ellie is a cutie... and so sweet! They're a beautiful family!


Monday, January 2, 2012

Pizzokie?

I am a HUGE fan of warm, gooey chocolate chip cookies served in a dish with a large scoop of vanilla ice cream on top! I'm recalling a certain dessert I had at my local "neighborhood grill",  that was served in a hot skillet with ice cream on top. It was TO DIE FOR!! 


Recently, I've been seeing a lot of recipes for a "Pizzokie". According to the Urban Dictionary, a "Pizzokie is a:


Pizza-cookie; a dessert served at a resturaunt called BJ's a big cookie, best with ice cream on top.

I of course had to try one of these recipes for myself! I found this recipe, where else, but on Pinterest! The original recipe is from www.whiteonricecouple.com. I of course adapted my own version below. I cut the recipe in half, which made 6 servings.... we don't need 12 of these things in our house!


Chocolate Chunk Cookies Recipe

Ingredients
3/8 c. (6Tbsp)  Light Brown Sugar
3/8 c. + 1T (7 Tbsp) Granulated Sugar
1/2 c. (1 stick) unsalted Butter
1 large Eggs
1 tsp. Vanilla Extract
1/2 tsp. Salt
1/2 c. all-purpose flour
1/2 tsp.  Baking Soda
1 c. semi-sweet chocolate chips


4″ ramekins (or other small baking dish)
Vanilla Ice Cream

Preheat oven to 375° F (350° for convection ovens)
1. Beat together the butter, brown sugar and granulated sugar until light and fluffy.  Add eggs, vanilla extract, and salt.
2. Sift together the flour and baking soda.  Stir into batter, then add chocolate chips and stir until well mixed.

3. Fill ramekins 1/2″ deep with raw cookie dough.  Place ramekins on sheet pan and put in middle rack of oven.  Bake 12-18 min., or until top starts to turn golden brown.  (remember you want them slightly undercooked, but not too doughy.)

4. Remove from oven and let cool 10-15 minutes. Top with ice cream and enjoy!!

*You will still need a pot holder to eat this after letting it cool, particularly if you use glass dishes like I did! 
These are even easier to make than regular old cookies- I love it! Plus, they're so much more fun to eat!!