
Saturday, August 27, 2011

How-To- Cupcakes in a Jar

Well hello there,
I hope all of my friends on the east coast are buckled in for this ride on Hurricane Irene! I thought I would share a how-to with all of you who might be house-bound and surfing the internet.

I have had the 4 oz. wide-mouth Kerr mason jars for these little jems for sometime now. I just recently got around to making them for my previous etsy shop, The Baking Bar. For those of you who follow my blog, you know that The Baking Bar is no longer operating (so don't go looking for these- you'll just have to make them yourself !)

Now, there are a few ways you can make these. You can make individual cupcakes, which is what I did first, or you can make a sheet cake and break it up into small pieces- which I did second and is a HUGE time-saver.

So on the left, you have a cupcake, which I have cut in half and pressed into the bottom of the jar, swirled in some Swiss Meringue Blueberry Buttercream (YUM). I then flattened the top part of the cupcake, placed it onto the layer of buttercream and finished with another swirl of buttercream. On the right is the version I made with sheet cake, broken into pieces and pressed into the jar- as you can see, not much of a difference aesthetically and well worth the saved time!

For your viewing pleasure a few more pictures... These would be great for a party or gifts... especially for kids parties... a well contained piece of cake= less mess! 


Monday, August 22, 2011


I need to share this recipe with all of my (maybe 3) blog readers :) I just wouldn't feel like a good blog-hostess if I didn't!

I made this recipe last weekend after having a craving for something with peanut butter and chocolate. But I didn't just want something with this fabulous combination, I wanted something decadent too! Let me introduce you to my new favorite brownie: Peanut Butter Cup Brownies. These are everything a girl could ask for... or any man that likes peanut butter and chocolate! I suggest refrigerating them... it makes them extra good!


Peanut Butter Cup Brownies
Brownie:
  • 3/4 cup butter, melted
  • 2 cup sugar
  • 2 teaspoon vanilla extract
  • 4 eggs
  • 1 cup all-purpose flour
  • 2/3 cup cocoa
  • 1/2 teaspoon baking powder
  • 1/2 teaspoon salt
Peanut Butter Filling:
  • 1 1/2 cups peanut butter
  • 2/3 cup honey
Ganache:
  • 1 1/2 cups chocolate chips
  • 4 tbsp. butter
Heat oven to 350°F. Grease a 9×13 inch baking pan.Stir together butter, sugar and vanilla in bowl. Add eggs one at a time, beating after each one. Stir together flour, cocoa, baking powder and salt. Add to butter mixture, beating until well blended. Spread batter evenly in prepared pan.
Bake 30 to 35 minutes or until brownies begin to pull away from sides of pan and toothpick comes out not quite clean. Cool completely in pan on wire rack.
Peanut Butter Filling: Stir together peanut butter and honey. Spread over cooled brownies.
Ganache: Melt butter and chocolate chips together in a microwave-safe bowl, stirring every 30 seconds, until smooth. This should only take 1-2 minutes. Pour evenly over brownies and spread carefully. Cool on counter or in refrigerator until set.
I found this recipe where else... FOODGAWKER!! It is from a blog called Becky Bakes. Check out her other yummy dishes by following the hyperlink :) I changed the recipe just a tad to include less butter and they were still amazing!
ENJOY!!


Friday, August 19, 2011

New and Improved

Well, Hello. I believe it's been about two months since the last time I posted. That was right about the time I also said I needed to start blogging more often!

Alot has happened in that time, including the summer flying by...

I closed The Baking Bar at the beginning of this month. It was my choice, prompted by the fact that when I decided to make everything official, I, in the process found out that I couldn't get a permit to bake out of my home from the Deparment of Health because I have a dog. I was a little perturbed by this. The inspectors explanation was that if I had a cat it could jump out of the litter box and on to the counter. Now, as much as I like to think my little Lily is as clean as can be I realize she still rolls in the grass and probably steps in dog excretions. However, she can't get up onto the counters and she doesn't shed either. I think for that reason I should have been an exception to this rule! Oh well, it looks like now I will just have to blog about my delicious recipes and share them with you! That is what inspired me to create Most Delish Dish Mondays. Every Monday, I will share with you one of the delicious dishes I've made recently. Get ready to salivate.

I also decided to close Le Bebe Nest. There are millions of baby focused stores out on etsy and I really wasn't getting anywhere with my baby items. However, I still love to create things for little ones. So, I decided to change the look and feel of my store and create a new generic name that will allow me to focus on whatever I want, rather than being stuck in the category of baby items due to my shop name. You will still see some of the baby items offered on Le Bebe Nest in my new store, Elizabeth Lou and Company . I will be shifting from the variety of baby items you saw in Le Bebe Nest to nursery related items... at least for now, until I find another fun thing to make :) I so enjoy making baby quilts. They can be absolutely adorable and the end product is always worth the hard work!


I will be working endlessly for the next couple of weeks to get Elizabeth Lou and Company on it's feet. So many things to order (cutomized tags, packaging materials, buisness cards...), so many things to take pictures of and post on my etsy shop and of course lots of sewing and crafting to do to fill up my shop! If any of you mommies out there have any ideas of things you would like to see in my shop, please let me know and I will certainly take your thoughts into consideration!

Well, I think this post has grown long enough...

Until Monday (I promise!)

Thursday, June 2, 2011

Inspiration

I really need to take the time to blog more often. My goal was weekly, but as you can see... it's been a couple of weeks since my last post.

Lately I have been working on Le Bebe Nest and deciding where I want to go with it. I have my first craft show two weekends from now on June 10th. I'm quite excited for it, but also anxious to see how it turns out. I have a whole lot of inventory at this point in preparation for the show!

After the craft show, I'm going to shift from the baby items I make now (a variety of things from pacifier clips to blankets to onesies) to quilts, blankets and gift sets (like burp cloths and bibs or burp cloths and a cute onesie). Maybe I'll throw in some nursery decor too... like buntings and wall art. :)

I have been SO inspired by all of the quilts I've been seeing in the blogs that I read. I've always admired quilts, more recently though, I've fallen in love with the more modern quilts. I am a huge fan, and have just started my first real quilt. When I say real quilt, I mean the ones that are more than just square blocks, like some of the ones I've had for sale on Le Bebe Nest in the past. Those are pretty simple, and though pretty, not all that complicated.
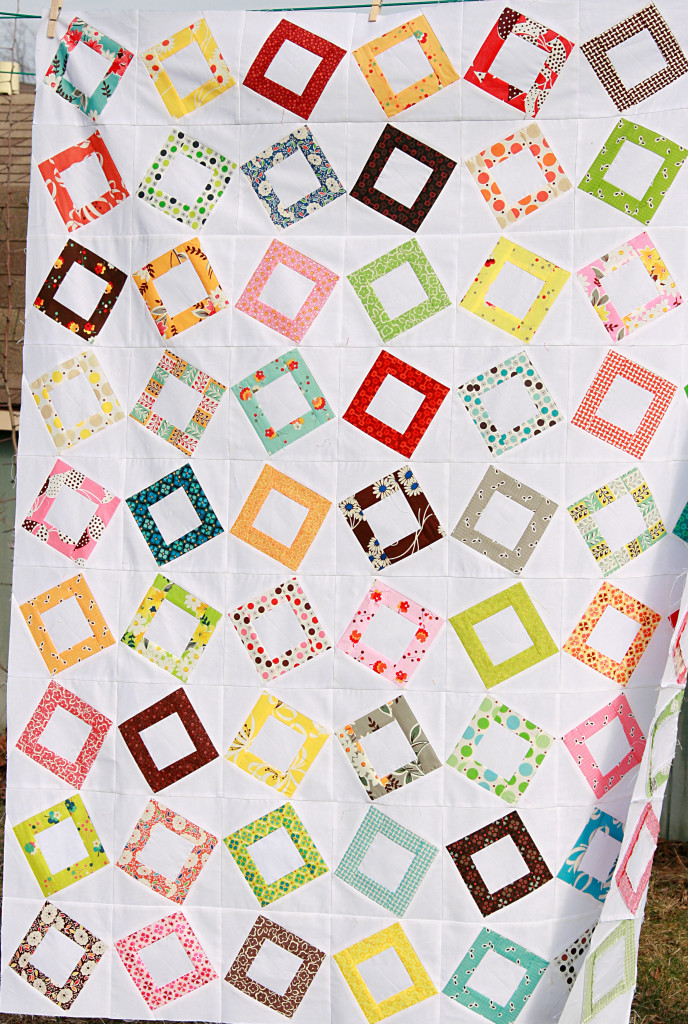
I love fabrics, so I'm really looking forward to designing my own quilts and getting to coordinate the fabrics. I adore fabric stores... I'm like a kid in a candy store! Check out some of the great quilts below for my inspiration!

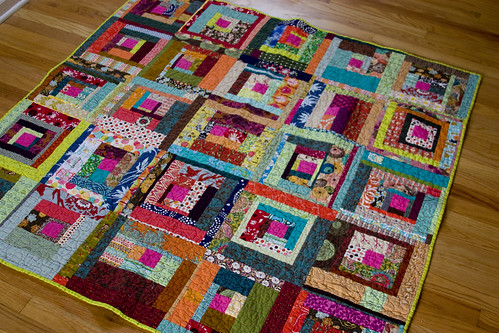
Bee Beautiful Log Cabin Quilt

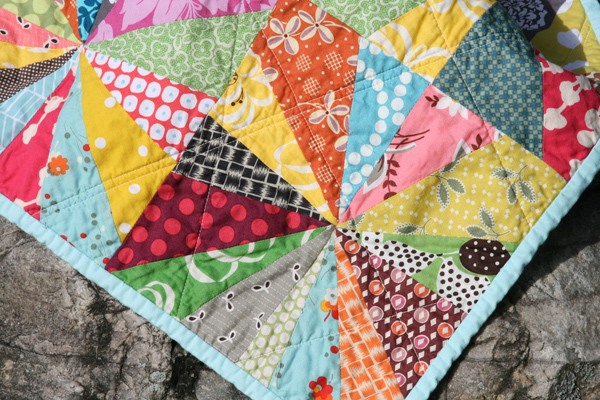
Zig Zag Baby Quilt
Blog: Red Pepper Quilts


Blog: Film In The Fridge


Blog: Little Miss Shabby

Sunday, May 15, 2011

Breakfast for dessert?

I am a HUGE fan of breakfast- especially french toast! When I came across this recipe for Cinnamon Toast Ice Cream on foodgwaker.com, I had to try it! It is originally from Tracey's Culinary adventures.

I have to admit, when I read the directions, it seemed like alot of work. Much more complicated than the chocolate J-ello pudding ice cream I make on a regular basis (inspiration from the ice cream sold at Coldstone Creamery). But, I was up for a challenge (and a messy kitchen!).

It wasn't as complicated as it sounded... it actually went pretty smoothly. And it turned out DELICIOUS!!


I made a few tweaks to the original recipe below. This version calls for regular, thick-sliced bread. I happened to come across "french toast" bread at my local giant- it's the store brand, and it is delicious! I used that instead. I also used skim milk.

Cinnamon Toast Ice Cream
2 cups whole milk
2 (3-inch) cinnamon sticks
5 slices firm white sandwich bread
1/2 stick (1/4 cup) unsalted butter, melted
2 tablespoons packed light brown sugar
1/2 teaspoon ground cinnamon
6 large egg yolks
1/2 cup granulated sugar
1/4 teaspoon molasses
1 cup heavy cream

Combine the milk and cinnamon sticks in a 2-qt saucepan. Bring the milk to a boil, then turn off the heat and cover the pan - allow to steep for 30 minutes.

Meanwhile, preheat oven to 300 F with racks in the upper and lower thirds. Line two baking sheets with parchment.

Cut 3 slices of the bread into 1/4-inch cubes and transfer them to a medium bowl. Pulse the remaining 2 slices of bread in your food processor to make bread crumbs. In a small bowl whisk the melted butter, brown sugar and cinnamon together. Drizzle about 3/4 of the mixture over the cubes of bread, tossing to coat them evenly. Transfer to one of the prepared baking sheets, spreading the cubes in a single layer. Add the bread crumbs to the remaining butter mixture and stir to coat. Spread on the second prepared baking sheet.

Bake the bread cubes and crumbs for about 25 minutes, or until golden brown and crisp. Stir occasionally and rotate the pans from top to bottom halfway through to ensure even baking. Leave on the pans and set aside to cool. Once cool, transfer the bread crumbs to a heatproof bowl.

Bring the milk back to a boil and then pour it over the bread crumbs. Let stand for 10 minutes, then pour the milk through a fine-mesh strainer into a saucepan. Press on the solids to extract as much milk as possible. Discard the solids afterward.

In a medium bowl whisk the egg yolks, granulated sugar, molasses and a pinch of salt together. Bring the milk to a boil once again. Slowly add the hot milk to the egg mixture, whisking constantly. Pour the mixture back into the saucepan and cook, stirring constantly, until it thickens enough to coat the back of a wooden spoon (it will register between 170 and 175 F on an instant read thermometer).

Remove the pan from the heat and stir in the heavy cream. Strain the custard through a fine-mesh sieve into a heatproof bowl. Cover and chill thoroughly in the refrigerator. Freeze the mixture in your ice cream maker according to the manufacturer's instructions. Fold in the bread cubes once churned, then transfer to an airtight container and freeze for at least 2 hours before serving.


Perhaps I was just being a little slow, but I was very confused by the instructions as to what exactly to do with the milk and bread crumbs. I had to ask my husband to read it and try to figure it out. The dilemma was that I put all of the bread- cubes and crumbs- on one baking sheet instead of two sperate sheets, like the recipe calls for. This is what stemmed my confusion. One part of the directions say "discard all solids" and then later in the directions it says to mix in the bread cubes. If I discarded all of the solids... there would be no more bread cubes to mix in!

To clarify: the milk goes poured over the bread CRUMBS, which then get discarded. The cubes are a seperate entity (and should be on a seperate sheet apparently) and just get mixed in at the end. Whew.... it took me a good 15 minutes of analyzing this before I gave up and asked my hubby! So, hopefully it's clarified for any of you that are confused!

Enjoy!!

CW

Monday, May 9, 2011

Mother's Day

Well, Yesterday was the day for mother's. I am not yet a mother, but I can celebrate my friends and family that are! And what a gorgeous day to do so :)

 My mother isn't big into family gatherings, she's quite a simple woman- a card and a phone call will suffice. I, on the other hand, would love to host a big lavish get together for every occasion (I say that now, however, after all of the prep and clean-up I may feel differently!). So, we went middle of the road and went over to my in-laws to spend some time with my lovely mother and father-in-law.

 I had to, of course, make dessert to bring along. A quaint little orchard near my in-laws sells these amazing fruit tarts and ever since I tried the first one, I've been trying to find one to match it... I'm still looking. But this is the one I tried yesterday:

Crust:

  • 1 1/4 cups all-purpose flour
  • 1/2 cup (1 stick) cold unsalted
  • 1/3 cup sugar
  • 1/4 teaspoon salt

Filling:

  • 1 (8-ounce) package cream cheese, softened
  • 1/2 cup granulated sugar
  • 1 teaspoon vanilla extract

Topping:

  • Fresh strawberries and blueberries

Glaze:

  • 1 (6-ounce) can frozen limeade concentrate, thawed
  • 1 tablespoon cornstarch 
  • 1 tablespoon fresh lime juice
  • 1/4 cup granulated sugar


The filling was great- fruit is fruit- the crust wasn't my favorite. I think I would prefer a confectioner's sugar version, like the one below:

Crust:
  •  1/2 cup confectioners' sugar
  • 1 1/2 cups all-purpose flour
  • 1 stick unsalted butter, softened and sliced

 I'll have to try this one next time- I'll let you know how it turns out!

I hope you all had a wonderful weekend, I know I did! Enjoy the beautiful weather this week :)

CW

Sunday, May 1, 2011

Creativity on a Sunday

So my husband has come up with this idea... I was facing a dilemma regarding shipment of cupcakes from The Baking Bar and he said, "Well, what about inside out cupcakes? Put the filling in the middle.

He is not from Lancaster County, so he wasn't aware that he had essentially just described a whoppie pie, gob... whatever the term is that you use. However, he did have a good thought and I liked it. Especially since whoppie pies usually don't get that outrageous with flavors. I think the most creative combination I've seen is oatmeal pies with vanilla filling. So, inside-out cupcakes it is! Let me tell you... my brain has been reeling with ideas of flavor combinations!

Dark Chocolate cake with strawberry meringue buttercream

Graham cake with honey cinnamon frosting

Devil's Food with peanut butter frosting

White Chocolate with oreo frosting


I made my first combination today. Almond cakes with lemon infused vanilla frosting. Oh, they are so good! They are nice and light- so refreshing!


Lemon Frosting:
4 Tbsp. butter, softened
3 1/4 cup confectioner's sugar
3 Tbsp. milk
1/2 tsp. vanilla
Zest and juice from half a lemon

Mix butter until smooth. Add 1 1/4 c. confectioner's sugar, beat until combined. Add 3 Tbsp. milk and remaining confectioner's sugar. Add 1/2 tsp vanilla and zest and juice from lemon. Beat until smooth.

This is a great summer baked good!

 Until next week,
 CW